How to Build Under-Cabinet Drawers & Increase Kitchen Storage
Introduction to Under-Cabinet Drawers
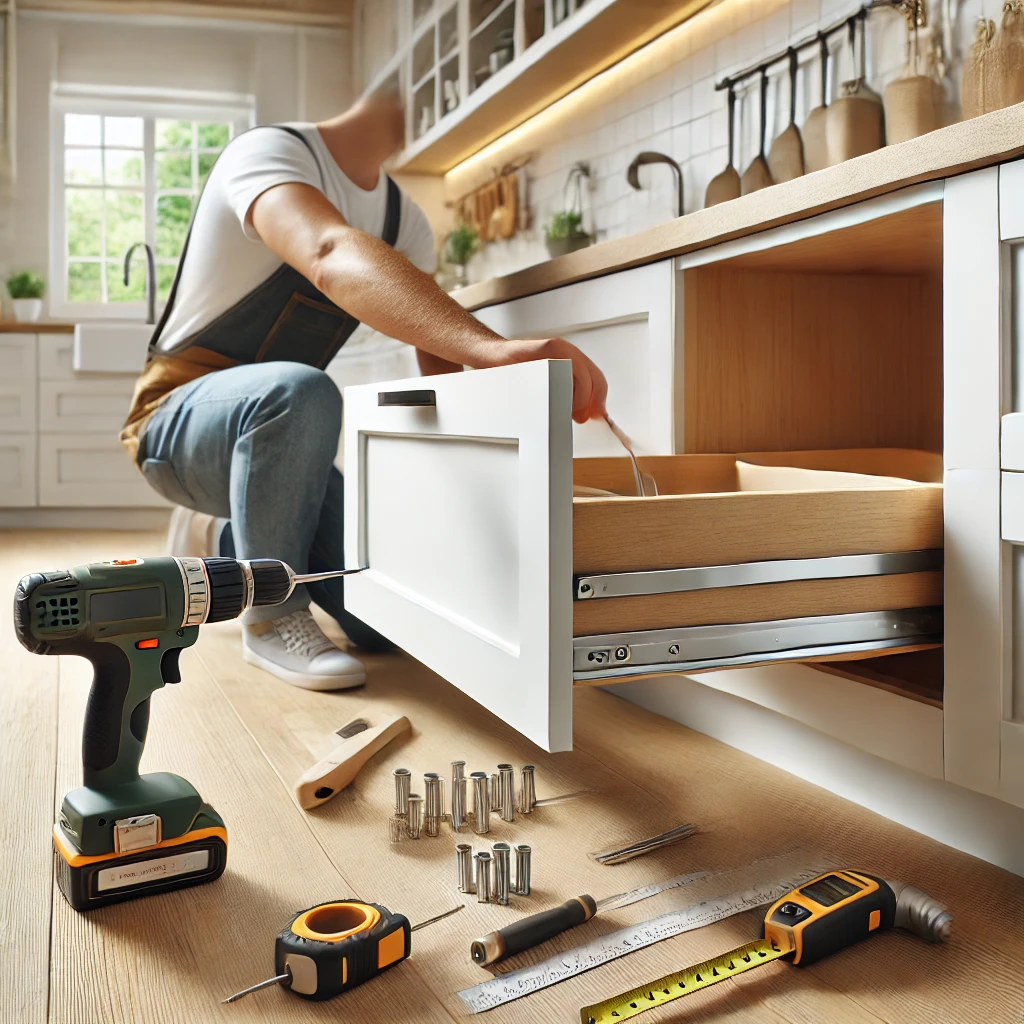
Under-cabinet drawers are a smart solution for maximizing unused space in your kitchen. They help you stay organized while keeping your counters clutter-free, making them a must-have for modern kitchens. Let’s explore why this storage hack is a game-changer and how you can decide if this DIY project is right for you.
Why Under-Cabinet Storage is a Game-Changer
Under-cabinet storage utilizes the hidden space beneath your cabinets, turning it into practical storage without sacrificing aesthetics.
- Maximizes Space: Ideal for smaller kitchens where every inch counts.
- Keep Essentials Handy: Store items like cutting boards, baking sheets, or cleaning supplies within easy reach.
- Maintains a Sleek Look: Keeps your kitchen neat and organized without visible clutter.
Benefits of Building Your Own Storage Drawers
DIY under-cabinet drawers not only save money but also give you the freedom to customize.
- Cost-Effective: A fraction of the cost of pre-made or professional installations.
- Tailored to Your Needs: Build drawers to fit your unique kitchen items, ensuring maximum utility.
- Satisfaction of DIY: Enjoy the accomplishment of creating something functional and stylish.
Is This DIY Project Right for You?
This project is perfect for anyone with basic DIY skills and a willingness to learn.
- Skill Level: Suitable for beginners with basic tools like a drill, screwdriver, and tape measure.
- Time Commitment: Can be completed over a weekend with proper planning.
- Flexibility: Offers customizable options, from materials to advanced features like soft-close mechanisms or LED lighting.
Whether you’re looking to enhance storage in a small kitchen or add functionality to a larger space, under-cabinet drawers are a practical and rewarding DIY project.
Can Under-Cabinet Drawers Work in Your Kitchen?
Before diving into a DIY project, it’s essential to determine whether under-cabinet drawers are a good fit for your kitchen. Let’s explore how to assess your cabinets, tackle common challenges, and discover creative alternatives for compact spaces.
Assessing Your Cabinet Layout and Baseboard Compatibility
Not all cabinets are created equal, so it’s important to evaluate your setup.
- Measure Baseboard Space: Check the height and depth of your cabinet’s toe-kick area to ensure it can accommodate a drawer system.
- Cabinet Design: Open-frame cabinets work best, while those with thick baseboards may need adjustments.
- Existing Utilities: Look out for pipes or electrical wiring that could obstruct the installation.
Proper planning ensures your under-cabinet drawers fit seamlessly without compromising functionality.
Common Challenges and How to Overcome Them
Every kitchen has its quirks, but most challenges can be resolved with the right approach.
- Toe-Kick Plate Removal: If the toe-kick plate is glued or nailed, use a pry bar gently to avoid damage.
- Uneven Floors: Install adjustable drawer slides or add shims to level the drawers.
- Obstructions Behind Cabinets: Identify potential obstacles like plumbing and plan the drawer size accordingly.
- Limited DIY Tools: Borrow or rent essential tools like a jigsaw or drill to ensure precision
By anticipating and addressing these issues, you’ll streamline the installation process.
Alternative Solutions for Small Kitchens
If your kitchen space or cabinet design isn’t compatible with traditional under-cabinet drawers, consider these alternatives:
- Slim Pull-Out Shelves: Utilize vertical space with slide-out shelves designed for narrow cabinets.
- Rolling Storage Carts: Add portable storage that fits neatly under your cabinets.
- Adhesive Storage Bins: Stick lightweight bins to the underside of your cabinets for quick and easy storage.
- Stackable Drawers: Place compact stackable drawers on counters or inside larger cabinets.
These solutions ensure you can enhance storage in any kitchen, regardless of size or layout.
Planning and Preparation
Proper planning and preparation are the foundation of a successful DIY under-cabinet drawer project. This section guides you through selecting tools, choosing the right materials, taking precise measurements, and considering optional upgrades to enhance your kitchen storage.
Tools You’ll Need
Essential Tools for Cutting, Measuring, and Installing
To build under-cabinet drawers, ensure you have these essential tools:
- Measuring Tools: Tape measure and a square for accurate dimensions.
- Cutting Tools: Circular saw or jigsaw for cutting wood panels to size.
- Drill and Bits: For securing screws and creating holes for drawer slides.
- Screwdriver: To assemble and fasten components.
- Sandpaper: To smooth rough edges and ensure a polished finish.
Having these tools ready will save time and make the process more efficient.
Choosing Materials

Types of Wood for Durability
Selecting the right wood ensures your drawers are sturdy and long-lasting:
- Plywood: Affordable, lightweight, and easy to work with.
- Hardwood: Offers a premium look and excellent durability for heavy-use drawers.
- MDF: Cost-effective but less durable; ideal for lighter storage needs.
Selecting High-Quality Drawer Slides
Drawer slides are crucial for smooth operation. Look for:
- Ball-Bearing Slides: Quiet and durable, ideal for heavy items.
- Soft-Close Slides: Prevent slamming and add a touch of luxury.
- Undermount Slides: Hidden for a clean, professional look.
Investing in quality materials enhances the performance and longevity of your drawers.
Measuring Your Cabinets
Accurate Measurements for Width, Depth, and Height
Measure your cabinets carefully to ensure a snug fit:
- Width: Measure the inside width of the cabinet opening.
- Depth: Check the space from the back of the cabinet to the front edge.
- Height: Determine the height available, factoring in baseboard clearance.
Factoring in Toe-Kick Plate Clearance
Toe-kick plates vary in height and depth, so account for them when designing your drawers. Ensure enough clearance to avoid interference when sliding the drawers in and out.
Considering Optional Upgrades
Soft-Close Mechanisms
Add soft-close drawer slides for a smooth and quiet experience. These prevent slamming, protect your drawers, and add a premium touch.
Decorative Drawer Faces
Elevate the look of your under-cabinet drawers with custom drawer faces. Options include:
- Painted Finishes: Match your kitchen color scheme.
- Stained Wood: Highlight the natural grain for a rustic feel.
- Modern Handles: Add sleek hardware for a contemporary vibe.
By planning your tools, materials, and measurements carefully and considering optional upgrades, you can ensure your DIY project is both functional and stylish.
Tools and Materials Checklist
Before starting your under-cabinet drawer project, gather all the necessary tools and materials to streamline the process. A comprehensive checklist ensures you’re fully prepared, minimizing interruptions and ensuring a smooth installation.
Comprehensive Tools List
Here are the essential tools you’ll need for this project:

- Drill and Drill Bits: For creating holes and securing screws.
- Circular Saw or Jigsaw: To cut wood panels to precise sizes.
- Screwdriver: Manual or electric for assembling components.
- Tape Measure: For accurate measurements of cabinets and materials.
- Square or Level: To ensure straight cuts and properly aligned installations.
- Clamps: To hold materials steady while cutting or drilling.
- Pencil and Ruler: For marking measurements and cutting guides.
- Sandpaper or Power Sander: To smooth out edges and surfaces for a polished finish.
Having these tools on hand will make your project more efficient and enjoyable.
Materials You’ll Need
Make sure to have the following materials ready for building and installing the drawers:
- Wood Panels: Choose plywood, hardwood, or MDF depending on your budget and durability needs.
- Drawer Slides: Opt for ball-bearing or soft-close slides for smooth operation.
- Screws and Fasteners: Ensure you have screws of the appropriate length for assembling the drawers and securing slides.
- Handles or Knobs: Add functional and decorative handles for easy drawer access.
- Paint, Stain, or Sealant: Finish your drawers to match or complement your kitchen’s style.
- Toe-Kick Plate Trim: If needed, to cover any gaps after installation.
By using this checklist, you can ensure you’re well-equipped to build under-cabinet drawers that are functional, durable, and stylish.
Step-by-Step Guide to Building Under-Cabinet Drawers
Transform your kitchen storage with this detailed guide to building under-cabinet drawers. Each step is broken down for clarity, ensuring that even DIY beginners can follow along.
Step 1: Remove the Toe-Kick Plate
How to Safely Detach the Plate Without Damage
- Use a pry bar or flathead screwdriver to gently loosen the toe-kick plate.
- Avoid cracking or breaking the plate by working slowly along its length.
- Label the removed piece to ensure proper reinstallation later.
Step 2: Measure and Mark
Creating a Blueprint for Your Drawers
- Measure the width, depth, and height of the toe-kick space.
- Consider the space for drawer slides and the baseboard when taking measurements.
- Sketch a simple blueprint with dimensions to guide your cuts and assembly.
Step 3: Cut and Assemble the Drawer Boxes
Tips for Precision Cutting
- Use a circular saw or table saw for clean, straight cuts.
- Double-check measurements before cutting to avoid waste.
Using Wood Glue and Screws for Stability
- Apply wood glue along the edges of the panels for extra hold.
- Secure the corners with screws to create a sturdy frame.
- Clamp the pieces together while the glue dries for best results.
Step 4: Attach the Drawer Slides
How to Align Slides for Smooth Operation
- Position the slides according to the manufacturer’s instructions.
- Use a level to ensure the slides are perfectly aligned.
- Secure the slides with screws, checking for smooth movement as you work.
Step 5: Build the Cradle System
What is a Cradle System and Why It’s Important
- A cradle system acts as a support structure to hold the drawers in place.
- Construct the cradle using sturdy wood strips cut to size.
- Secure the cradle to the underside of the cabinet for a stable foundation.
Step 6: Install the Drawer System
Ensuring Proper Fit and Functionality
- Slide the drawer boxes into the cradle system.
- Check alignment and make adjustments if needed.
- Test the drawers to ensure they open and close smoothly.
Step 7: Add Drawer Faces and Handles
Aligning and Securing Drawer Faces for a Seamless Look
- Attach drawer faces using screws from inside the drawer box.
- Use spacers to maintain even gaps between faces for a professional appearance.
- Install handles or knobs for easy access.
Step 8: Final Adjustments and Finishing Touches
Sanding and Painting for a Polished Appearance
- Sand all surfaces and edges for a smooth finish.
- Paint or stain the drawers to match your kitchen decor.
- Apply a sealant for added durability and protection against wear.
With these step-by-step instructions, you’ll have custom under-cabinet drawers that enhance your kitchen’s storage and style.
Advanced Customizations
Take your under-cabinet drawers to the next level with these advanced customizations. These enhancements not only improve functionality but also add a touch of luxury and personalization to your kitchen.
Adding Soft-Close Features
Soft-close drawer slides prevent slamming and ensure smooth, silent operation.
- Installation: Replace standard slides with soft-close ones or attach a soft-close adapter to existing slides.
- Benefits: Prolongs the life of your drawers, reduces noise, and adds a premium feel to your cabinetry.
- Tip: Test the soft-close feature during installation to adjust the tension as needed for optimal performance.
Installing LED Lighting for Better Visibility
Illuminate your under-cabinet drawers for enhanced usability.
- Types of Lighting: Use battery-powered stick-on lights for simplicity or hardwired LED strips for a seamless look.
- Placement: Attach the lighting to the interior top edge of the drawer box for maximum visibility.
- Benefits: Improves visibility, especially in dimly lit kitchens, and adds a modern touch.
Here is complete guide on: Complete Guide to Installing Under Cabinet Lighting in Your Kitchen
Creative Decorative Elements for Drawer Faces
Make your drawers stand out with stylish, custom faces.
- Material Options: Choose from stained wood, painted finishes, or even textured panels like beadboard or glass inserts.
- Hardware Selection: Upgrade to designer handles, knobs, or pulls that match your kitchen’s aesthetic.
- Personal Touches: Add trim, moldings, or inlays to create a one-of-a-kind look that complements your kitchen decor.
By integrating these advanced customizations, you can transform standard under-cabinet drawers into a highly functional and visually appealing feature of your kitchen.
Maintenance and Care
Proper maintenance ensures that your under-cabinet drawers continue to function smoothly and look great for years. Here are some tips to keep your drawers in top condition:
Cleaning Tips for Under-Cabinet Drawers
Regular cleaning keeps your drawers looking fresh and free from buildup.
- Routine Cleaning: Wipe down the inside and outside of the drawers with a damp cloth. Use mild soap or wood cleaner for tough stains.
- Deep Cleaning: Remove all items from the drawers, vacuum out any dust or debris, and clean the tracks and slides to maintain smooth operation.
- Protecting Surfaces: Use a furniture polish or wax for wooden drawer faces to prevent dirt buildup and maintain a shiny finish.
How to Address Drawer Slide Issues
If your drawers aren’t gliding as smoothly as they should, it’s time to troubleshoot the slides.
- Lubrication: Apply a dry lubricant (such as silicone spray) to the tracks and slides to reduce friction. Avoid using oily lubricants, as they can attract dirt.
- Alignment: Check if the slides are properly aligned. If they are misaligned, carefully loosen and adjust them before tightening.
- Cleaning the Tracks: Remove any dirt, dust, or debris from the tracks, as these can obstruct smooth operation.
Repairing Scratches or Damage
Minor wear and tear can happen over time, but with proper care, it’s easy to repair.
- Wood Surfaces: For minor scratches, use a wood filler or wax stick that matches your drawer’s finish. Gently rub it into the scratch, then buff with a soft cloth.
- Painting Tip: Use a high-quality primer before painting to ensure even coverage and better adhesion.
- Surface Damage: For deeper gouges or cracks, consider sanding and refinishing the area. Sand lightly before applying a fresh coat of paint or stain.
- Drawer Faces: If the damage is extensive, you may want to replace the drawer face or consider creative solutions like adding decorative trim to cover imperfections.
With these simple maintenance tips, your under-cabinet drawers will stay functional and beautiful, adding lasting value to your kitchen.
Conclusion
Building and customizing under-cabinet drawers is a fantastic way to enhance both the functionality and aesthetics of your kitchen. By following the right steps and adding a few advanced features, you can create personalized storage solutions that save space and reduce clutter.
Transform Your Kitchen with Smart Storage Solutions
Under-cabinet drawers are not just about storing kitchen essentials; they offer a sleek, efficient, and organized way to utilize otherwise unused space. Whether you choose to build simple pull-out drawers or add advanced features like soft-close slides or LED lighting, these upgrades will make your kitchen feel more spacious and functional.
Share Your DIY Journey With Us!
We’d love to hear about your under-cabinet drawer project! Whether you’ve completed your build or are still planning, share your experiences, tips, or any challenges you faced along the way. Your journey might inspire others to take on this rewarding DIY project.

